
This post contains affiliate links. Please read my disclosure here for more information.
Changing the Default Font for Your Templates in Adobe Illustrator: A Step-by-Step Guide
Designing with Adobe Illustrator offers a plethora of creative opportunities, especially when it comes to typography. The typeface you choose can make a significant difference, setting the mood, tone, and overall feel of your artwork. While Adobe Illustrator has its set of default fonts, there are times when a project demands something unique. In such cases, setting a custom default font for your templates can expedite the design process.
However, it's crucial to understand that any changes you make to the default font in a specific file or template will remain confined to that file. If you start a new document, Illustrator will revert to its original default font settings. This specificity ensures that each project retains its unique identity without affecting the global settings. In this guide, we'll delve deep into the steps to change the default font for your templates in Adobe Illustrator, ensuring a seamless design experience.
Professionalism and Branding:
In the business world, consistency is key. Brands often have specific fonts that they use across all their materials to ensure a uniform identity. By setting a default font for your Illustrator templates, especially if it's one aligned with a brand's guidelines, you can ensure that every piece of content you create is on-brand and exudes professionalism.
Why Myriad Pro is the Default:
In the vast sea of fonts, Myriad Pro has managed to establish a significant presence. But what makes it so special?
Historical Context:
Myriad Pro's design journey began in the 1990s and has since become a staple in the design community. Its clean lines and versatile design make it a favorite among professionals.
Versatility:
Myriad Pro's design is neutral yet friendly, making it suitable for a wide range of applications, from corporate documents to creative projects. Its clarity ensures legibility, whether it's on a business card or a billboard.
Comparison:
While Myriad Pro is undeniably a standout, it's essential to acknowledge the vast world of typefaces out there. For instance, Abril Fatface offers a contrasting style with its bold and dramatic flair, making it ideal for headers and highlights.
Changing the Default Font in Adobe Illustrator:
As we've established the significance of fonts and the prominence of Myriad Pro, it's time to delve into the crux of our guide: changing the default font for your templates in Adobe Illustrator.
Step 1: Accessing the Character Style Panel:
- Download and Launch Adobe Illustrator and open your desired template or document.
- Navigate to the "Windows" menu situated at the top.
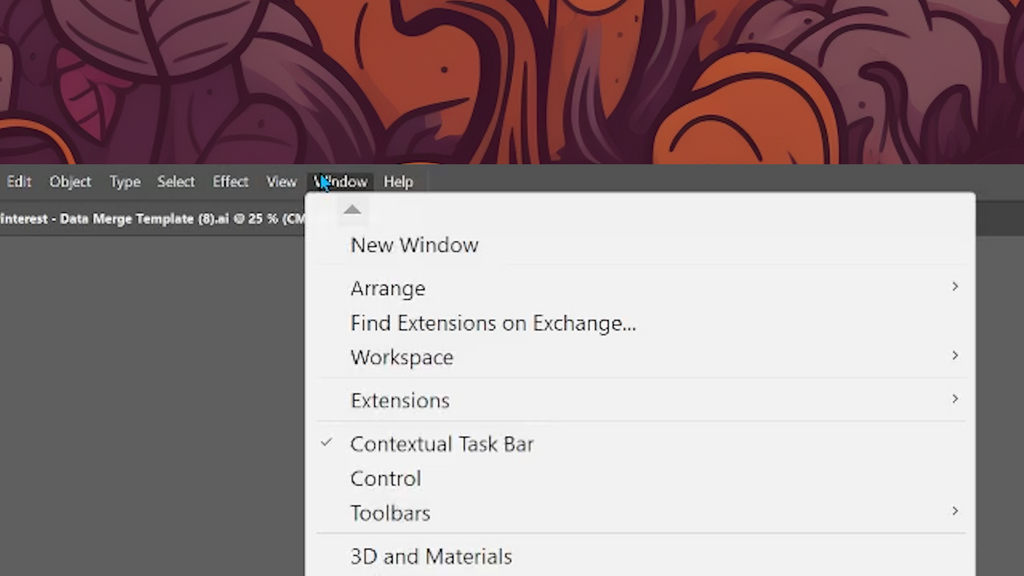
- Hover over "Type" in the dropdown.
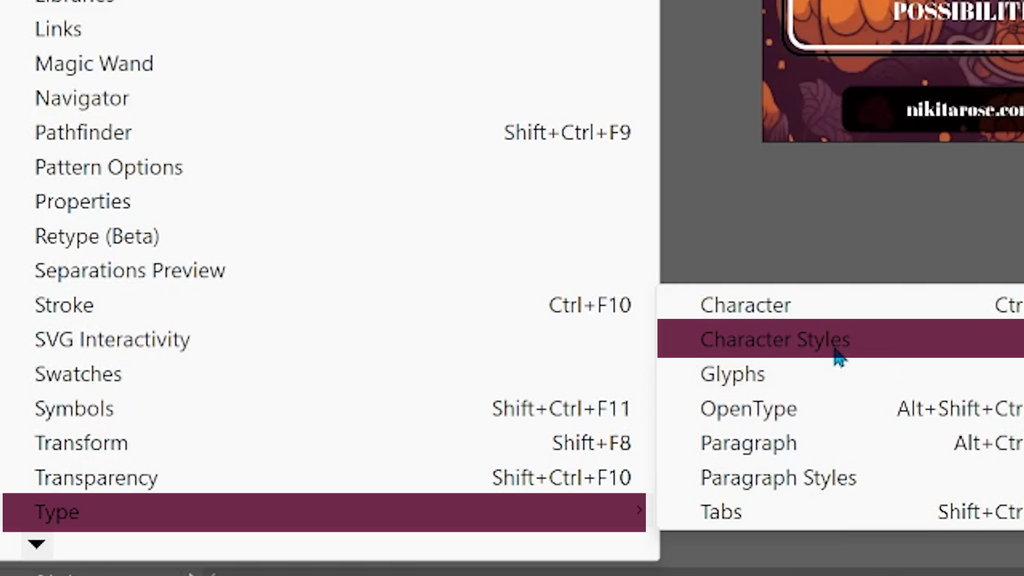
- From the cascading menu, select the "Character Style" option.
Step 2: Modifying the Default Settings:
- Inside the Character Styles tab, you may see a list of styles if you have already been creating them or you may just see the "Normal Character Style" - Double-click on it.
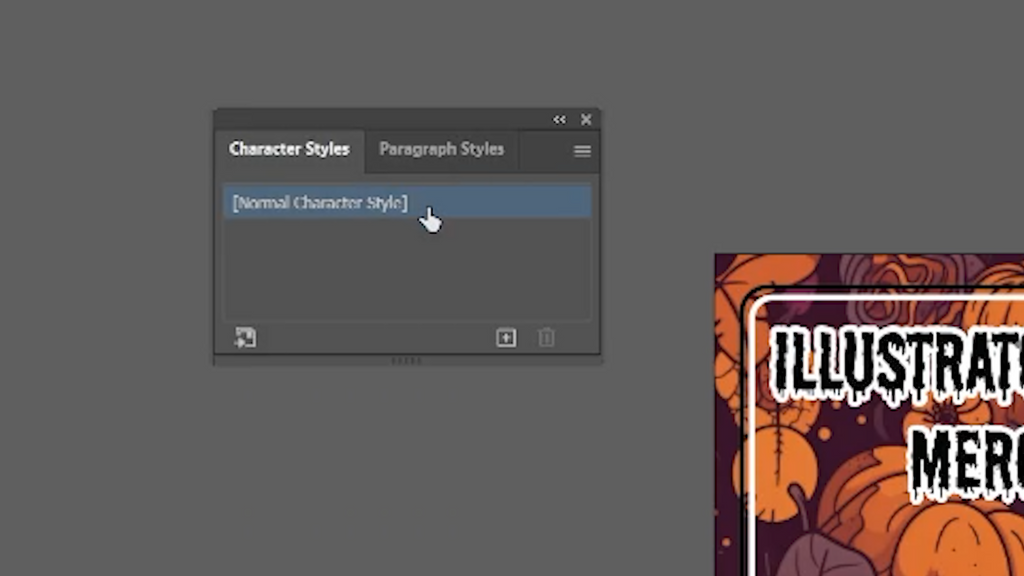
- This action will bring up the Character Style Options window. Here, you'll get a glimpse of the default settings, with various attributes like font, size, and color.
Step 3: Customizing Your Font:
- In the Character Style Options window, navigate to the [Basic Character Formats].
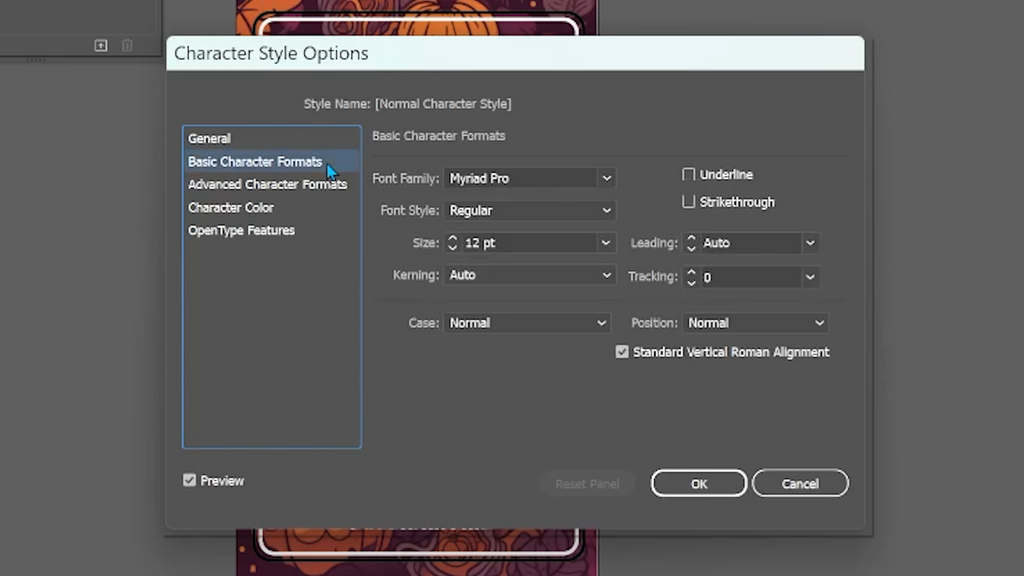
- Browse and select your desired font. For this guide, we'll choose Abril FatFace.
- Adjust other attributes, such as size and color, to fit your design needs. For demonstration, we'll also show how to change it to Abril Fatface with a size of 100 pt.
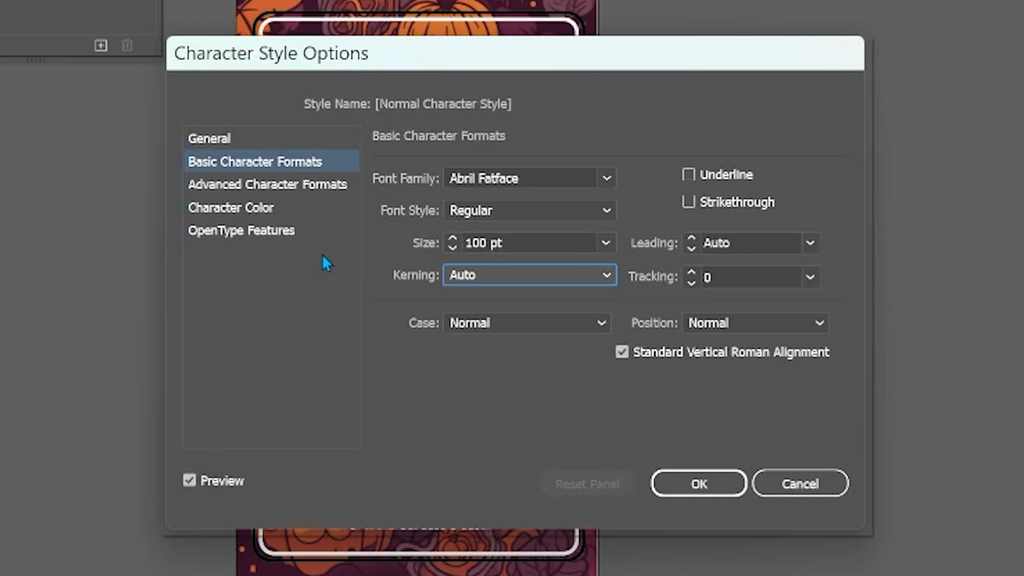
- Once satisfied, click "OK" to save your changes.
Step 4: Finalizing and Testing:
- With the new default font set, start typing in your template. You'll notice that the text now adopts your chosen font.
- Remember, this change is specific to the current file or template. When you create a new document, Adobe Illustrator will revert to its original default font settings.


